This week I have finished my first draft of the report, and I'm now starting to put together the appendices. That means that this will be my last blog, as I need to include it in the appendix.
The report is around 13,000 words long, and I'm quite pleased with that. I'm going to get some feedback and polish it up a bit before the final hand in on May 2nd.
The last thing I need to do is a short presentation on the project. That's going to take place on Wednesday, and will be followed by a demonstration of the program.
Thanks for reading!

Friday, 22 April 2011
Wednesday, 13 April 2011
Week 29 - Report.6
This week I have broken the 10,000 word barrier!
Since the previous week, I have completed the Requirements Analysis and Design sections of the report. I've still to do the Intro, Testing, Conclusions and Reflections sections, as well at the rest of the appendices.
I'll also need to start working on my presentation soon, that's due to be given in around two weeks time.
Thats all for this week.
Thursday, 7 April 2011
Week 28 - Report.5
Quite a bit of progress on the report writing this week - I have finished the implementation section, and the word count is standing at ~ 7700 words, not including the appendix.
I say that because, on Robs advice, I have created another appendix section for tables and calculations. I have moved the orbital calculation steps which were in the research section, into the appendix, to improve the reading of the report. I've also included the table of orbital elements that I used in this appendix.
Aside from that, I cleaned up a bit of the implementation discussion that was going a bit too in depth, so I think its reading quite well at the moment.
No meeting this week as it's our holiday week, so I'm aiming to have the requirements analysis, and design sections completed by the next meeting.
Wednesday, 30 March 2011
Week 27 - Report.4
Report word count: 4150
I have still been writing the implementation section this week. I have written about the vector class, the first model loading stages and implementing the orbital calculations to get animation. I've been having a slight problem, in that I am not sure whether it is best to discuss the implementation in a linear fashion, as in when I coded them, or discussing things in a class by class basis. What I've settled on so far is a mix, discussing small classes like Vector3D and CreatePlanet on their own, but breaking down the main DrawSolarSystem class into seperate discussions like Model Loading and Animation.
I'm finding loads to write about in this section, and I think it will end up the longest section in the report by far.
No word back from Rob on the draft I sent in last week, hopefully that means its not too bad! I'm sure we'll discuss any issues with it in the meeting tomorrow.
That's all for this week.
Wednesday, 23 March 2011
Week 26 - Report.3
This week I'm up to about 2,800 words in the report.
I've finished the research section - it's 1668 words, and I'm currently writing the implementation section. I'm going to send a copy of the report so far to Rob tonight, so he can give some feedback on my writing style and correct any issues there may be with it!
Hopefully I'll be able to finish the implementation section by next week, although I've only written about two classes and I'm already over 1,000 words so it could be quite a long section.
Thursday, 17 March 2011
Week 25 - Report.2
Still writing the report!
I've got the cover pages and contents sorted, and I've made a start on the research section - I've wrote about 1,200 words so far, and I'm hoping to get to at least 2,000 in this section, if not more.
Another exciting report update next week!
I've got the cover pages and contents sorted, and I've made a start on the research section - I've wrote about 1,200 words so far, and I'm hoping to get to at least 2,000 in this section, if not more.
Another exciting report update next week!
Friday, 11 March 2011
Week 24 - Report
The blogs will be a lot shorter now, as I'm just using them to record my progress as I get this report done! I'm aiming for somewhere around 10,000 words, and here's the initial report structure (subject to change):
1. Introduction
2. Requirements Analysis
3. Research
4. Design
5. Implementation
6. Testing
7. Conclusions
8. Reflections
Appendices
A. References
B. Initial Project Brief
C. Extra Program Screenshots
D. Selected Code Sections
E. Presentation Slides
F. Project Log
I'm planning on getting started this coming week, likely on writing the research section.
Sunday, 6 March 2011
Jupiter Planet View
I made a short video demonstrating Jupiter's planet view option, check it out at:
http://www.youtube.com/watch?v=ldHQ8yLYRLc
The video demonstrates two orbits of the Sun, you can see it passing the Sun and the inner 4 planets, and Saturn on it's second orbit.
http://www.youtube.com/watch?v=ldHQ8yLYRLc
The video demonstrates two orbits of the Sun, you can see it passing the Sun and the inner 4 planets, and Saturn on it's second orbit.
Thursday, 3 March 2011
Week 23 Continued - Planet View images
Please check the previous blog for a technical summary of this weeks work!
Here are some images of the planet views that I implemented this week, and a final program shot. Click to expand images. The Saturn view is my favourite, be sure to check them all out!


Here are some images of the planet views that I implemented this week, and a final program shot. Click to expand images. The Saturn view is my favourite, be sure to check them all out!

Shot of the final program, defualt planet sizes and distances (they're hard to spot!)

Shot of the final program, expanded model sizes and distances decreased

Mercury, default size

Mercury, largest size

Venus, default size

Venus, largest size

Earth, default size

Earth, largest size

Mars, default size

Mars, largest size

Jupiter, default size

Saturn, default size

Saturn, largest size

Uranus, default size
Neptune, default size
Wednesday, 2 March 2011
Week 23 - Planet View and Completion!
This week was the deadline I had set myself to complete the program, so - have I managed it?
Just about! I still have a couple of tweaks I want to make, and clean up some code, but effectively the program is now fully functional and as advanced as I am going to make it.
I've changed quite a bit this week, cleaning a few things up - I've implemented arrays in several places where I had lists of variables for each planet, and completely reworked my planet rotation method to fix an error where the planet would stop if the speed became too great. The main addition this week though is the implementation of "planet views", an option on the menu which allows the user to focus the camera on one planet, and the camera will follow along as the planet orbits the Sun.
Firstly, the arrays I've implemented. I've replaced four variable lists with arrays:


Previously there was a model variable for each planet, a size variable for each planet etc, but using an array instead cleans things up greatly, and hopefully improves the program speed a little as well. Example: mercSize is now size[0], venSize is now size[1] etc.
Now, onto the planet rotation. The problem was that the rotation value is given by the rotation amount times the speed factor. When that equals 360, the planet stops spinning. Example: Earths rotation amount is 18 degrees. When the speed factor is increased to 20, the rotation amount is 18x20 = 360, so the planet appears to be still when the speed of the program is at 20 times. Since each planet reaches it's fastest speed when the rotation amount = 180 degrees, I simply worked out when this was for each planet and stopped increasing the rotation amount at that point. It's all explained in the method comments, here it is:


Finally, the planet views. To implement these I had to create 8 new methods in the DrawSolarSystem class - one for each planet, called mercuryView(), venusView etc. I also had to modify the camera controls to use gluLookAt, so I could focus the camera on a position.
So, in each view method I set the camera's position, and the camera's focus, using the X,Y,Z coordinates of each planet. For the cameras position, I had to move it slightly off the X,Y,Z of the planet so you could see it - I perfected each position by assigning a 'test' variable to be added or subtracted to the Y or Z, and controlled the increments with the keyboard. These keyboard controls are now commented out, and I replaced the test variables with an actual number once I'd gotten the best camera position. I also had to set certain booleans to false so they did not affect the camera. Here is an example of the mercuryView method:

The next step was to add this method into the DrawGLScene method. Since i wanted this view to be activated when a menu option is selected, a boolean trigger is required to be set to 'true' in order for the view to be shown.

Finally, in the menu responder I simply set the boolean for the planet view I want implemented to true (in this case Mercury), and all the rest to false.

I've also included an option to return to the default view, which simply resets the camera and loops through the planetView array, setting all the booleans to false.

I'm going to post a blog following this one, with screenshots of all the planet views.
Save for some minor tweaks, thats the program pretty much finished. I'm really pleased with the end result, and delighted I've been able to implement all the features I wanted to in the desired timeframe. Onto the report!
Just about! I still have a couple of tweaks I want to make, and clean up some code, but effectively the program is now fully functional and as advanced as I am going to make it.
I've changed quite a bit this week, cleaning a few things up - I've implemented arrays in several places where I had lists of variables for each planet, and completely reworked my planet rotation method to fix an error where the planet would stop if the speed became too great. The main addition this week though is the implementation of "planet views", an option on the menu which allows the user to focus the camera on one planet, and the camera will follow along as the planet orbits the Sun.
Firstly, the arrays I've implemented. I've replaced four variable lists with arrays:

Previously there was a model variable for each planet, a size variable for each planet etc, but using an array instead cleans things up greatly, and hopefully improves the program speed a little as well. Example: mercSize is now size[0], venSize is now size[1] etc.
Now, onto the planet rotation. The problem was that the rotation value is given by the rotation amount times the speed factor. When that equals 360, the planet stops spinning. Example: Earths rotation amount is 18 degrees. When the speed factor is increased to 20, the rotation amount is 18x20 = 360, so the planet appears to be still when the speed of the program is at 20 times. Since each planet reaches it's fastest speed when the rotation amount = 180 degrees, I simply worked out when this was for each planet and stopped increasing the rotation amount at that point. It's all explained in the method comments, here it is:


Finally, the planet views. To implement these I had to create 8 new methods in the DrawSolarSystem class - one for each planet, called mercuryView(), venusView etc. I also had to modify the camera controls to use gluLookAt, so I could focus the camera on a position.
So, in each view method I set the camera's position, and the camera's focus, using the X,Y,Z coordinates of each planet. For the cameras position, I had to move it slightly off the X,Y,Z of the planet so you could see it - I perfected each position by assigning a 'test' variable to be added or subtracted to the Y or Z, and controlled the increments with the keyboard. These keyboard controls are now commented out, and I replaced the test variables with an actual number once I'd gotten the best camera position. I also had to set certain booleans to false so they did not affect the camera. Here is an example of the mercuryView method:

The next step was to add this method into the DrawGLScene method. Since i wanted this view to be activated when a menu option is selected, a boolean trigger is required to be set to 'true' in order for the view to be shown.

Finally, in the menu responder I simply set the boolean for the planet view I want implemented to true (in this case Mercury), and all the rest to false.

I've also included an option to return to the default view, which simply resets the camera and loops through the planetView array, setting all the booleans to false.

I'm going to post a blog following this one, with screenshots of all the planet views.
Save for some minor tweaks, thats the program pretty much finished. I'm really pleased with the end result, and delighted I've been able to implement all the features I wanted to in the desired timeframe. Onto the report!
Wednesday, 23 February 2011
Week 22 - Proper Rotation!
This week I was focusing on attempting to get the planets to rotate properly around their tilted axis, instead of around the global z axis. I have to admit, I didn't think I would be able to fix this - but in the end, I managed it!
I started by fixing the rotateToAxis method. The intention of the method was to rotate the axis that the planet spins around (the z axis) by the number of degrees of axis tilt. However, if you remember from the previous blog, I couldn't get this to work at all and the planets disappeared when I tried to use it. After last weeks meeting with Rob, he pointed out that the vector being used would have to first be normalised, or the whole thing wouldn't work - the major point I had missed. Here is the reworked version of this method:

The dot product and cross vector methods called here have also been slightly adapted - they now only require one vector to be passed down - this simplifies things from the previous technique.
Once I had this method working, I still had the same issue - what was the vector that needed to be passed to this method? I knew it would be the vector that ran at the angle of the axis tilt, but that was it. Then the lightbulb moment - the rotation_angle variable in this method was the axis tilt.
Once I had realised this, I removed the call in initGL that rotates the planet by its axis tilt - after all, the rotateToAxis method would take care of this.

If you look back to the rotateToAxis method, you will see that there are commented out "cout" calls - these print the variables like rotation_angle to the console, so I can see what each variable is at each part of the calculation. I knew that the vector was rotated around the Z axis, so the vector I needed to input would be of the form (1,1,?), with the question mark changing for each planet. I discovered that increasing this number decreased the rotation angle, and decreasing the number increased the angle. So, with a lot of trial and error, I matched up the rotation_angle with the axis tilt value by adjusting the z value of the input vector. It's difficult to explain, but here are the input vectors for each planet, that might help to clear things up:

Once I had done this, all I needed to do is add a call to rotateToAxis before each planet is drawn:

and Voila! Planet's that rotate about their own axis. I'm really pleased I got this fixed, it gives the program a much more authentic look to it. The only other thing I added this week was a simple boolean switch to remove or add the stars in the background. This is an option on the menu now (hopefully you can also see that the planets are correctly tilted!):

And finally... I let the program run for a while (check the date!) and managed to get a snapshot with all the planets on screen. I'm a little unsure if Uranus' ring spin is correct, but this will be an issue with the model not the calculations if it isn't, I need to check that with Rob.

That's all this week. I just need to implement the 'planet views' option that will zoom to a planet and move the camera with it's orbit, and the program is completed! If I manage that by the end of the month, then I'll have hit my deadline.
Wednesday, 16 February 2011
Week 21 - Rotation and Menus
This week I have been working on getting the planets rotating at the correct speeds and around their axis - quite difficult! - and implementing a pop up menu system, moving over some of the functionality I had coded into the keyboard controls.
Firstly, planet rotation. The first thing I had to do was work out a way to animate the rotation - this was fairly simple, and required a glRotatef call before drawing the planet in myDrawGLScene. For example, the Earth would rotate by "earthSpin" degrees every frame as the program runs. The variable earthSpin (there is a unique Spin variable for every planet) is updated in the method planetRot, which assigned the appropriate rotation value to each variable.
In order to calculate the correct rotation values, I needed a few things - firstly, how long it takes each planet to rotate 360 degrees, which I found at this website. Secondly, I needed to calculate how many frames it took the Julian day to increase by 1 as the program ran. Since the Julian day is currently set in the program to increase by 0.05 every frame, that means that it takes 20 frames for the day to increase by 1. Using this information I was able to work out the correct rotation values for each planet - the math is explained in more detail in the comments beside the code in the following screenshots of the planetRot function (click to expand):


each value has to be multipled by speedFactor, so that the rotation increases as the speed of orbit increases.
The next major problem was rotation around the axis of the planet. Each planet had already been rotated slightly by it's axis value - these rotations were all done around the Z axis of each planet, basically rotating around a vertical axis instead of the off centre one it needed to go around. This gave me a major headache, as opengl only allows for transformations around the X, Y and Z axes. I spent many hours reading information on matrix tranformations and aligning an axis to a vector but to be honest, I didn't really understand it too well. From the information and code examples I had come across, I developed the following function:

...which didn't work. It is meant to align the axis to a given vector, but I realised that the vector I was aligning it to (the vector position of the planet) would not be at the correct axis tilt anyway, and I have no idea how to get that vector. I have kept the method in the program for now, and it is something I will need to discuss with Rob tomorrow.
The solution I have been working on since that method failed is rotating by the axis value before the planet is drawn, then correcting that afterwards, like so:

This does seem to improve the look of the planets rotation, but I'm not sure if it's correct.
Now, onto opengl menus. The creation of the menu is all handled by a method called CreateMenus() in the main.cpp file. The handling of what each menu option does is taken care of by a method called myMenuResponder(int selection) in the DrawSolarSystem class. The menu handles:
- Listing the keyboard controls (submenu)
- Controlling the scale of the distance between the planets and the Sun (submenu)
- Controlling the scale of the planets (submenu)
- Zooming into a view for each planet (submenu)
- Changing the view between horitzontal and vertical
- Switching to full screen mode
- Resetting the scene to the load up config
- Exiting the program
Here is the CreateMenus method that shows how all these options are programmed:


The very last line tells the program to call this menu whenever the right button of the mouse is clicked - this is how the user accesses it. Here is a small section of the myMenuResponder method. Each option in the above code is given a number, which is how these two methods are linked.

And finally, a couple of screenshots that demonstrate the program in vertical / horizontal view mode, and with the pop up menu up:


Note that the planets have been increased to their maximum scales, with the outer four planet's distances also decreased to their minimum value (as close as they can get to the Sun).
That's all for this week. Hopefully I'll be able to address the axis rotation and lighting/shadow issues for next week.
Wednesday, 9 February 2011
Week 20 - User Interaction
Following a short break, it's back to work on the Honours Project. I'm aiming to have the program fully finished by the end of February, the features I'm aiming to improve/add are:
The second piece of functionality that has been added is the ability for the user to increase the size of the individual planets. This was something discussed in my last meeting with Rob, and I decided that in order for the user to get a good look at the models (especially the smaller inner four planets) without lots of zooming and panning, this would be a great feature to implement. At the moment, only the planet Earth has this fucntionality coded, and it is controlled by the 'u' (to increase size to a max of 8x the original) and 'i' (to decrease size) keys. This is a feature I intend to move to the menu system, simply for the reason that I will run out of keyboard keys if I use two per planet. In order to code this, I introduced a variable earthSize, which is controlled in a similar way to the speed variable, increasing or decreasing the variable on a key press. I had to move the scaling function for the model from InitGL, where it was located in the display list, into myDrawGLScene, in order for it to update correctly whilst the program is running.

The final piece of functionality that I added this week was scaling the distances from the Sun. There are two options for the user in this case - they can increase/decrease the distance of the inner four planets from the Sun (currently using the 'f' and 'g' keys) or increase/decrease the distance of the outer four planets from the Sun. This gives the user the option to see the planets bunched in much more closely than the correct scale that the program launches in. This is controlled by two variables - innerScale and outerScale, with a default setting of 16 (purely for aesthetic reasons, although this could change). The positions of the planets that are defined in earth Update..Position method are multiplied by these variables, which are increased or decreased by a key press. The increase value for both variables is limited to 20, whilst different limits are applied for the inner and outer decrease values - in the inner case, so Mercury does not disappear into the Sun model, and in the outer case, so Jupiter and Mars' orbits don't collide.
The image below shows the outer planets decreased to their lower limit, Jupiter appearing very close to the inner four planets.

That's all for this week.
- More user interaction. This has been partly addressed this week.
- Improve lighting and shadows. Currently the planets don't have a 'dark side' where the Suns light doesn't hit them. I've no idea why this is as the lights are set up in the centre of the Sun, so I may not be able to solve this.
- Implement pop up menus. All the user interaction is keyboard and mouse based at the moment, and there's too many functions going on to have them all implemented by a key press - I want to move some stuff over to menus, and also include a pop up with control details for the keyboard functions.
- Rotate planets as they orbit. Currently the planets aren't rotating as they move, and implementing this has proved more difficult than I first thought it would be.
- Improve movement controls. This is the least important update, so it may get cast aside if I run out of time, but I would like to improve the way the user moves around the 3D solar system - it's not brilliant but it works, so I wouldn't be too worried about leaving it if need be.
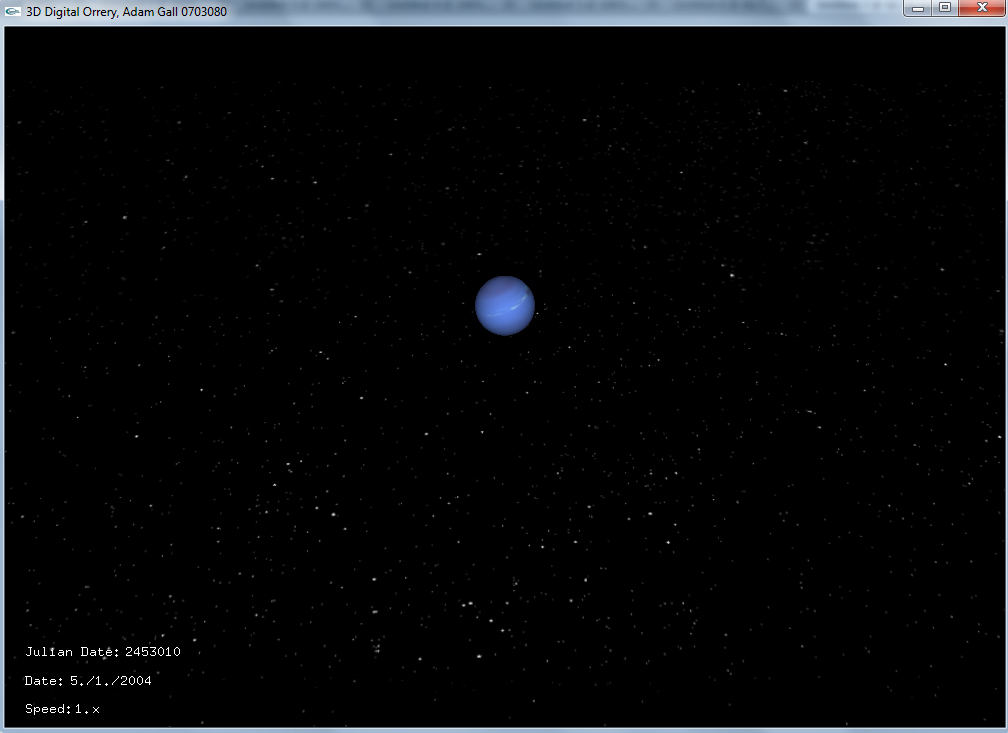
So onto the improvements in the user interaction that have been added this week. The major cosmetic change is the addition of a speed control. I had previously attempted to add this in using a variable called speedFactor which was adjusted everytime the user pressed a key - but could not get it to work. I solved this by moving the code which updates the julian date:
julDate += (0.1 * speedFactor);
from the updateMercPosition function that it was in, into the main myDrawGLScene method, which fixed the issue of the speedFactor variable not being updated by a user key press. Now whenever the user presses 'm' the speed is increased (to a maximum of 25x), with n decreasing the speed (minimum of 1x). The program launches in 1x speed, and can be increased by the user to 25 times the launch speed. The speed is displayed on screen, beneath the two date displays like so:


The second piece of functionality that has been added is the ability for the user to increase the size of the individual planets. This was something discussed in my last meeting with Rob, and I decided that in order for the user to get a good look at the models (especially the smaller inner four planets) without lots of zooming and panning, this would be a great feature to implement. At the moment, only the planet Earth has this fucntionality coded, and it is controlled by the 'u' (to increase size to a max of 8x the original) and 'i' (to decrease size) keys. This is a feature I intend to move to the menu system, simply for the reason that I will run out of keyboard keys if I use two per planet. In order to code this, I introduced a variable earthSize, which is controlled in a similar way to the speed variable, increasing or decreasing the variable on a key press. I had to move the scaling function for the model from InitGL, where it was located in the display list, into myDrawGLScene, in order for it to update correctly whilst the program is running.

The final piece of functionality that I added this week was scaling the distances from the Sun. There are two options for the user in this case - they can increase/decrease the distance of the inner four planets from the Sun (currently using the 'f' and 'g' keys) or increase/decrease the distance of the outer four planets from the Sun. This gives the user the option to see the planets bunched in much more closely than the correct scale that the program launches in. This is controlled by two variables - innerScale and outerScale, with a default setting of 16 (purely for aesthetic reasons, although this could change). The positions of the planets that are defined in earth Update..Position method are multiplied by these variables, which are increased or decreased by a key press. The increase value for both variables is limited to 20, whilst different limits are applied for the inner and outer decrease values - in the inner case, so Mercury does not disappear into the Sun model, and in the outer case, so Jupiter and Mars' orbits don't collide.
The image below shows the outer planets decreased to their lower limit, Jupiter appearing very close to the inner four planets.

That's all for this week.
Sunday, 9 January 2011
Week 15 - Planet Models and Sky Box
My last major update was some weeks ago, detailing the completion of text on the screen. This that point, the program has progressing significantly - most of all aesthetically.
The first problem in the programs looks I wanted to solve was how to get a starry background in place - this adds greatly to the realism of the program. I decided that the best method would be to create a sky box - essentially a large box around the camera with edges that blend into each other, so it looks like a continuous background every way you look.
This proved to be more difficult that I had anticipated. In the end, I used sky box tutorial code, found here, and edited the size of the box and the images to be displayed myself. Another problem risen by this was the use of the GLaux library - which has been discontinued. This is mainly used in the loading of the BMP image for each side of the box. I had to implement replacement code, which I found here.
Initially, I used a really hi res star map I found using google images - this can be seen in the background for the program two blogs ago, showing the Earth. I replaced this with a star map found on the NASA website - namely, the Hipparcos star map. The stars are really colourful, and I used the original colouring at first - but found it was too hard to spot some of the smaller planets like Mercury in the program, because they looked like one of the stars in the map! So I greyscaled the image and used that as my background. Because the scene has to look continuous, every side of the sky box uses the same image.
In my project plan I had specified that I had hoped for planet modelling and loading into the program to be completed by this week, week 15 - and that is the other main part I have managed to complete this week. You can see the renders for each model in the previous blog. The models unfortunately cannot look that good in the program, but I think they still look pretty nice. Another big change from the previous blog is that I have fixed the lighting - in my excitement at getting the models into the program and working, I had not noticed that the lightning was no longer affecting them. In fact, I had forgot to turn on GL lightning in the myDrawGLScene class! I placed this call after the Sun model is draw - this way, shadows don't affect the Sun model so it appears to be a light source.
The final change I made was to make the model scales more realistic - previously, they were very rough estimates by myself, just to give an idea. I used the size calculator at this website, with the largest planet having a scale value of 1.21 - Jupiter (actually saturns is larger, but this is because the model is loaded in a lot smaller due to the rings). If the Sun was draw to scale, it would have a value of 11 - this is too large realistically for my model, so it is currently at a value of 2 (although I may change this).
Finally for this week, a screenshot of the program, again seen from Jupiter. As you can see, the lighting has made quite a difference to the quality of the model:

The inner four planets have all taken a size decrease, whilst Jupiter has actually got slightly bigger than I orginally had it. You can make out The Earth, Venus and Mercury in various states of orbit in the above image, as well as Mars (red dot some way above Venus, quite hard to spot!).
That's all for this week. The next major update will probably not be till the start of the new semester, due to exams.
Wednesday, 5 January 2011
More Models + Program shot
Another quick update today, I finished all the 3Ds Max models and here are some screenshots of the renders. Remember and click to expand the images.
The Sun

Mercury

Venus

Mars
 Jupiter
 Saturn
 Uranus

Neptune

And finally, a shot of the program, from the perspective of Jupiter looking towards the Sun. You can see the inner four planets - Mars (top right), Earth and Venus (above the Sun) and Mercury (small dot below the Sun). I've also decided to use a different star image in my skybox, as the last one seemed a little busy and hurt the eyes - I think this one looks better.

Full technical update still to come at the end of the week.
The Sun
Mercury
Venus
Mars
Neptune
And finally, a shot of the program, from the perspective of Jupiter looking towards the Sun. You can see the inner four planets - Mars (top right), Earth and Venus (above the Sun) and Mercury (small dot below the Sun). I've also decided to use a different star image in my skybox, as the last one seemed a little busy and hurt the eyes - I think this one looks better.

Full technical update still to come at the end of the week.
Subscribe to:
Posts (Atom)